In this post, I’m going to walk you through the steps for making a striped buttercream cake. Have you seen them? Striped cakes started popping up all over the place recently. They are a great way to add some color to your cake. You can dress the stripes up, you can make them masculine, or girly. They can be fun or glamorous. They can also seem a bit intimidating… but I promise you, anyone can make a stripped cake!
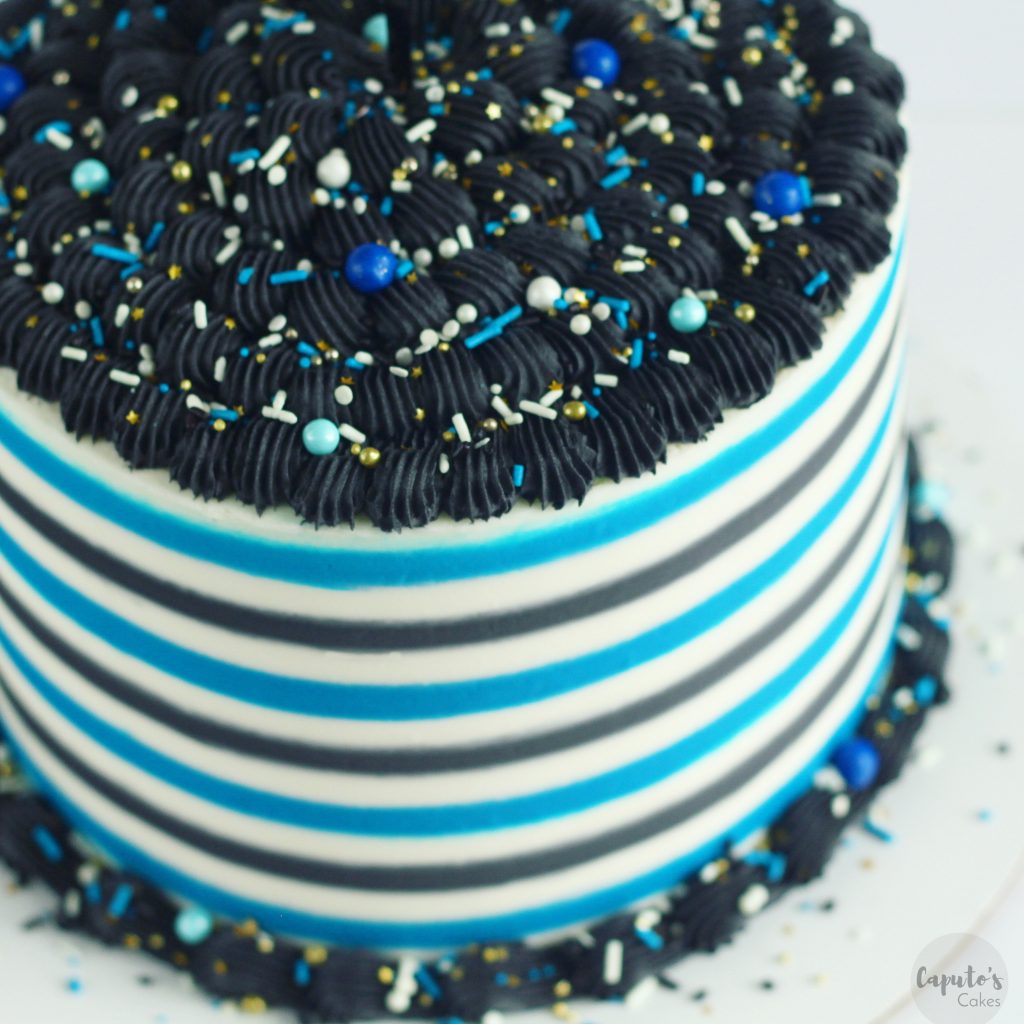
Follow along if you would love to learn more about how to make a striped cake
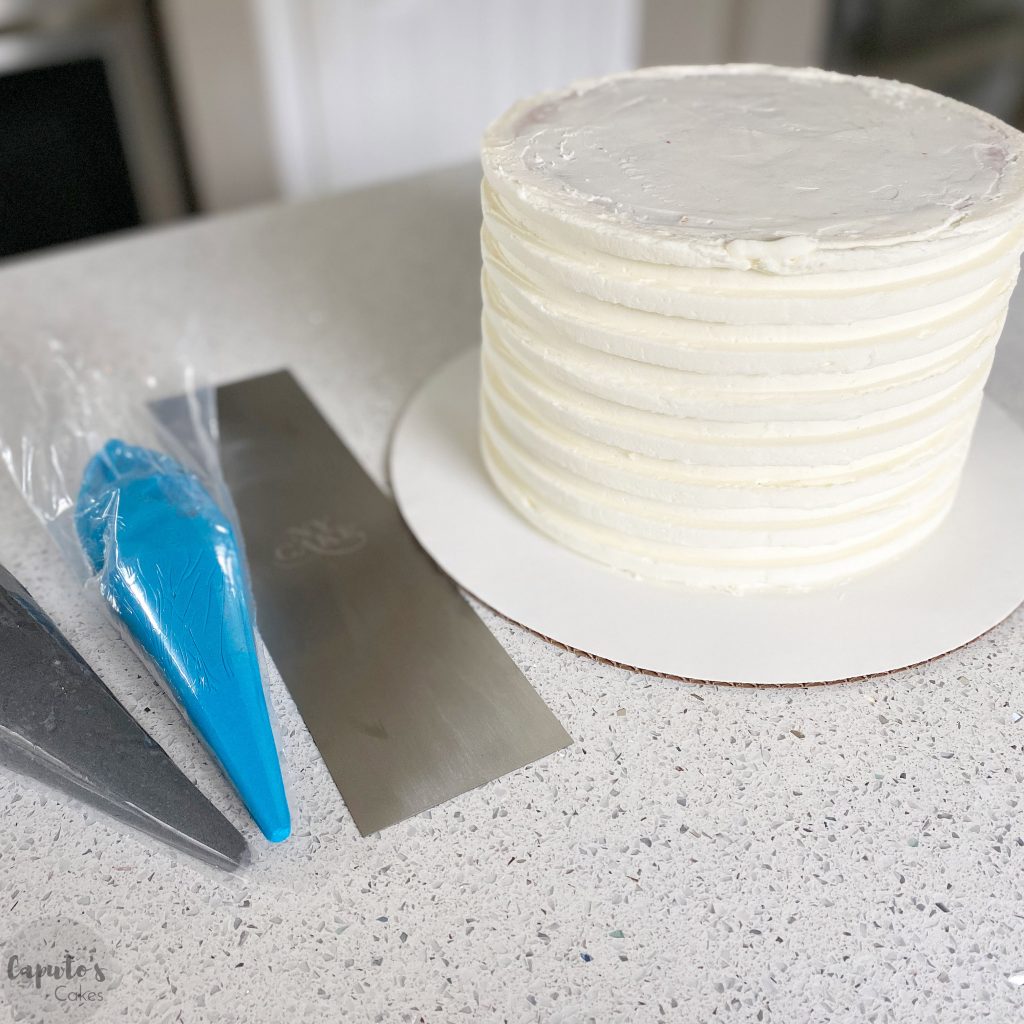
1. The first step in making a striped cake is to create a base stripe color. In this cake, I used white buttercream (Click HERE for my American buttercream recipe). After your crumb coated cake is chilled, take it out of the fridge and apply a nice thick layer of your base buttercream. You want to make this layer of buttercream as even as possible, so try to get the thickness the same for the whole cake. After your cake is covered in buttercream, take your striped cake comb (link, link, link) to create the stripes. You want to make sure your buttercream is at room temperature when you create this first set of stripes.
You will take your stripe comb around the cake multiple times. Each time scraping off any excess buttercream. If there are any gaps in the buttercream, go back and fill them with your piping bag. Continue to take your cake comb around your cake until your stripes are evenly layered and your holes are all filled.
2. Next, and most importantly, set your cake in a very cold fridge or in your freezer. You want the buttercream to be cold and firm. I usually set my cake in the fridge, with the temperature on the lowest setting, and I leave it there for a few hours or over night.
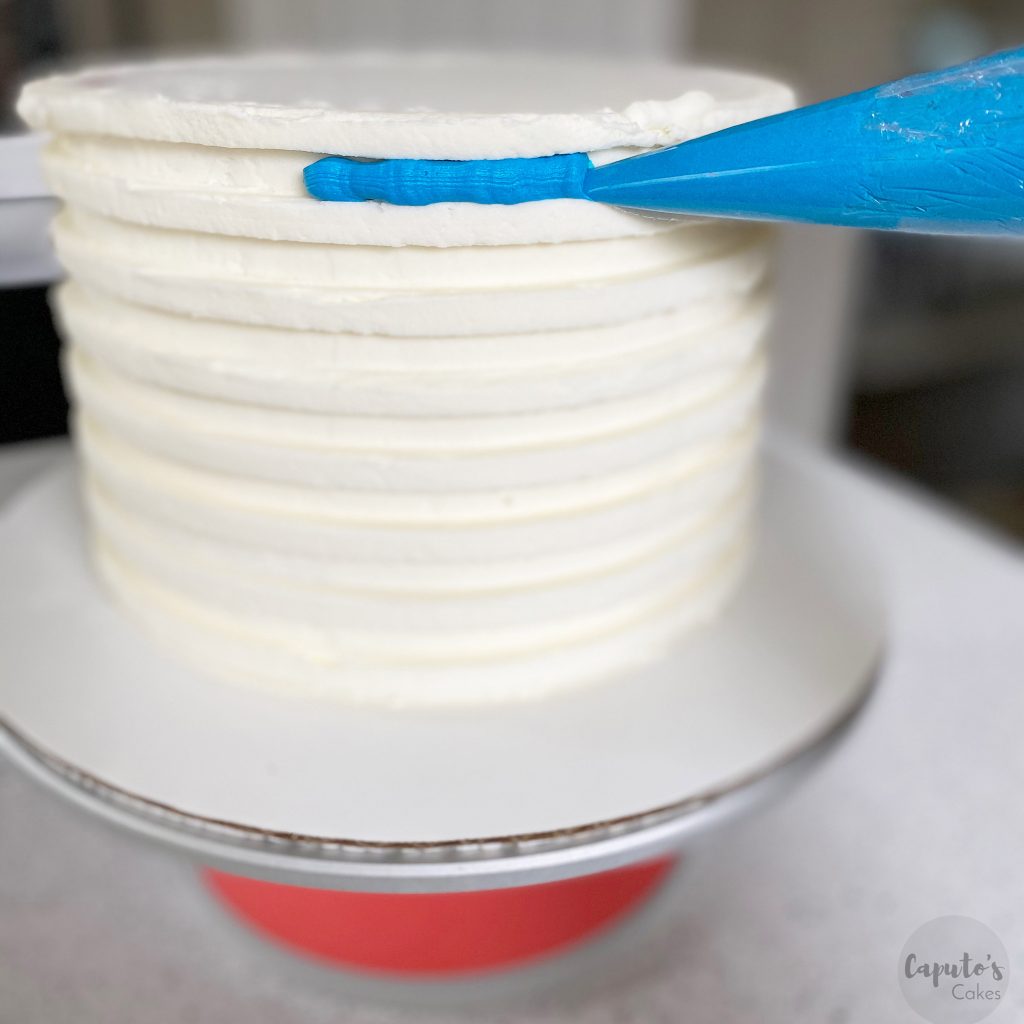
3. Once your buttercream is cold, its time to add the rest of the stripes to your cake. For this cake I used the colors blue and black.
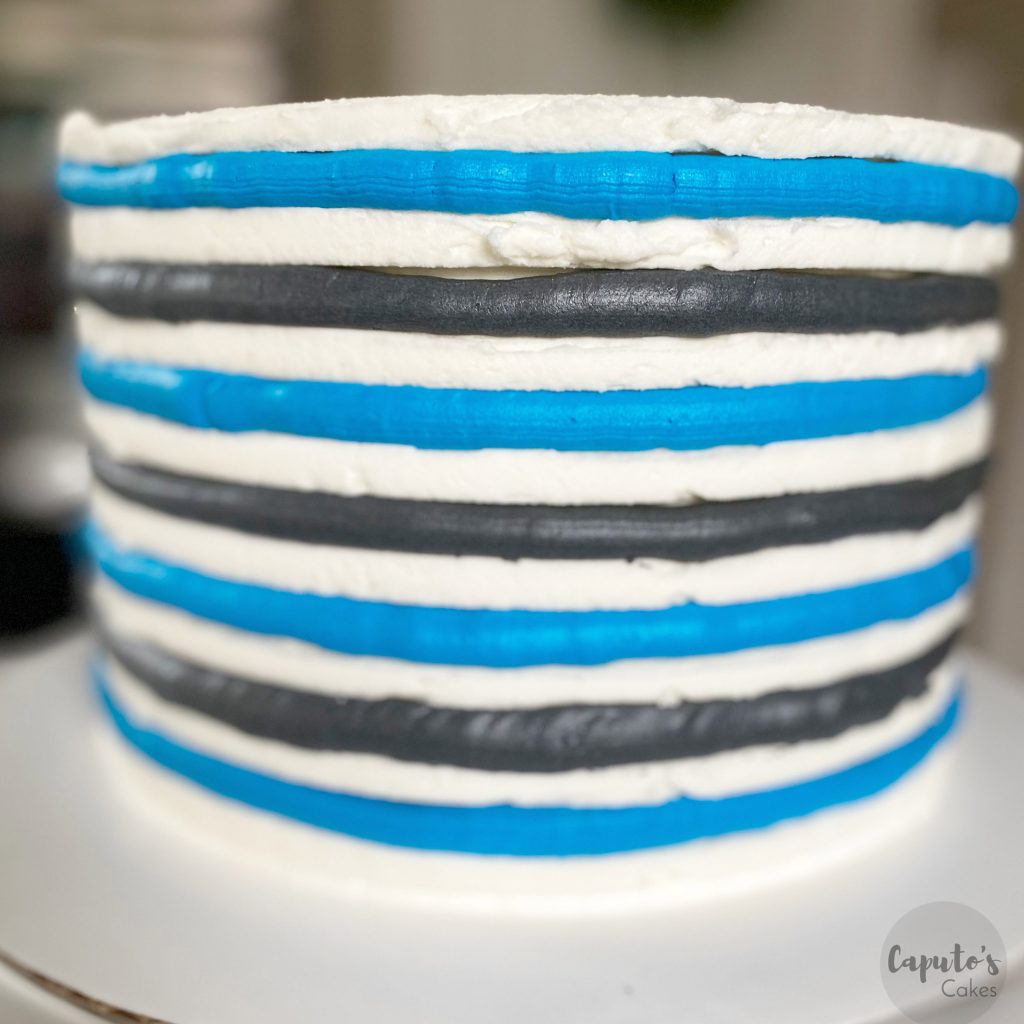
You can use as many colors as you want for this step. I also like to use a piping bag, one for each color, with the tip of the bag snipped off to match the thickness of my indented stripes. Take your piping bag, and fill in the stripes on your cake, making sure there are no gaps or holes in the buttercream.
Once your stripes are filled in, take your icing scraper (link, link, link) and go around your cake, scraping off any excess buttercream.
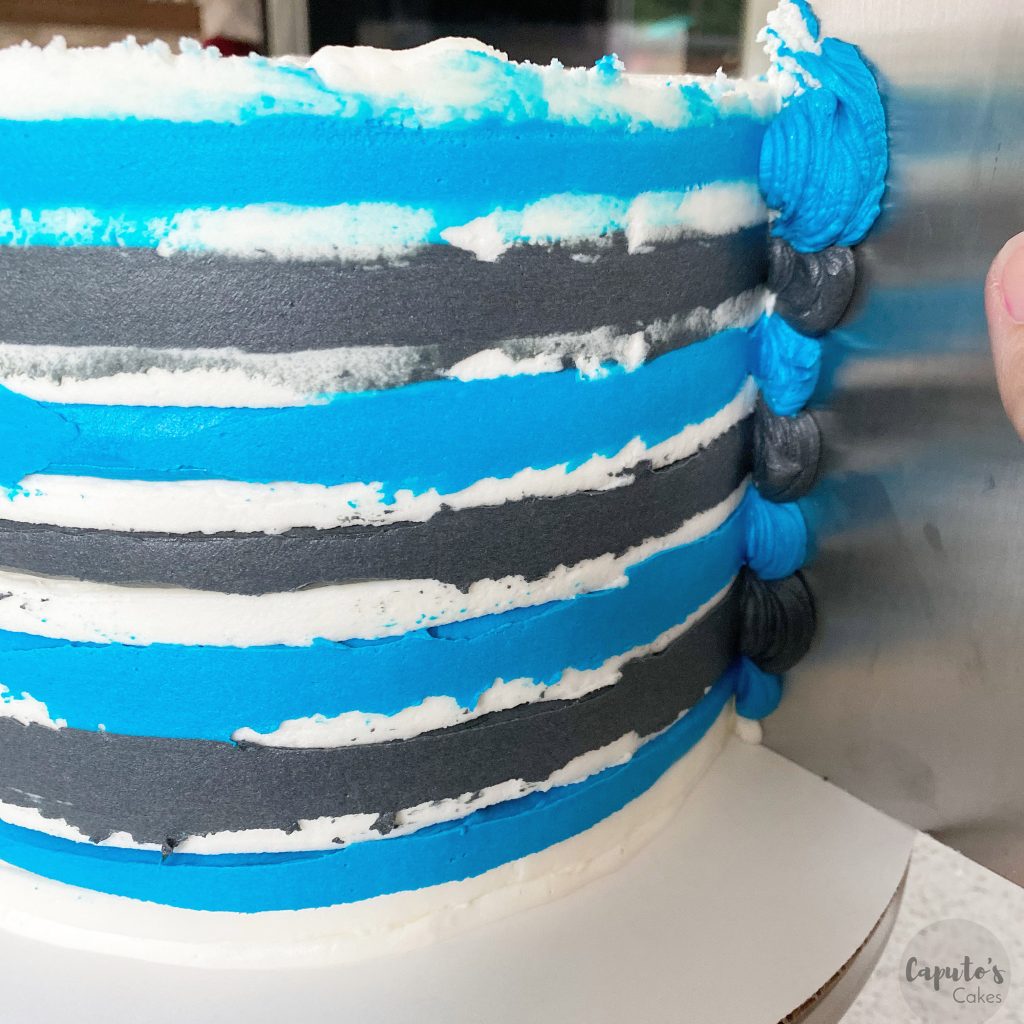
Continue to use the scraper until you see your stripes emerge. You can also use your piping bags to fill in any holes that my appear while you scrape. This process takes a lot of patience and multiple times going around your cake with the scraper. Continue scraping your cake until you are happy with the end result!
When your done make sure to pop the cake back in the fridge to firm up the buttercream, and then decorate the top however you want!

