
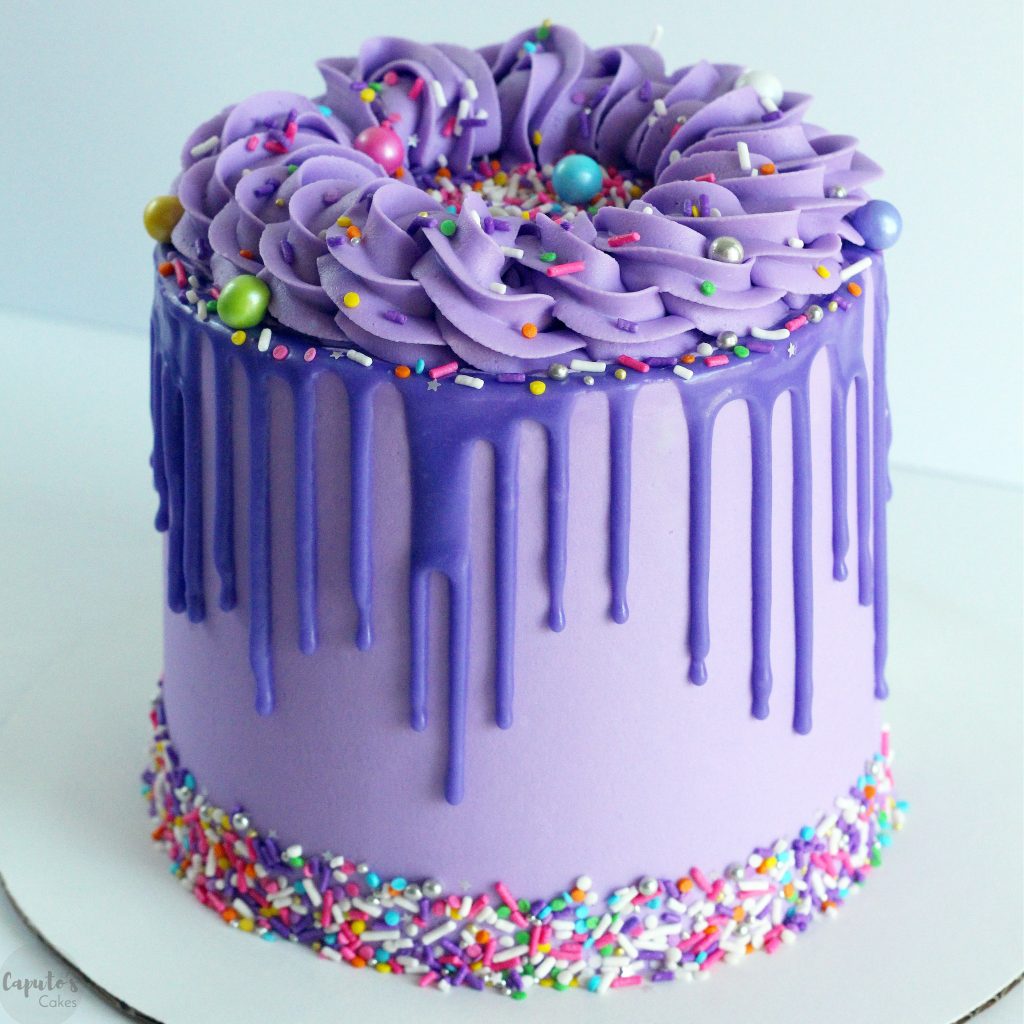
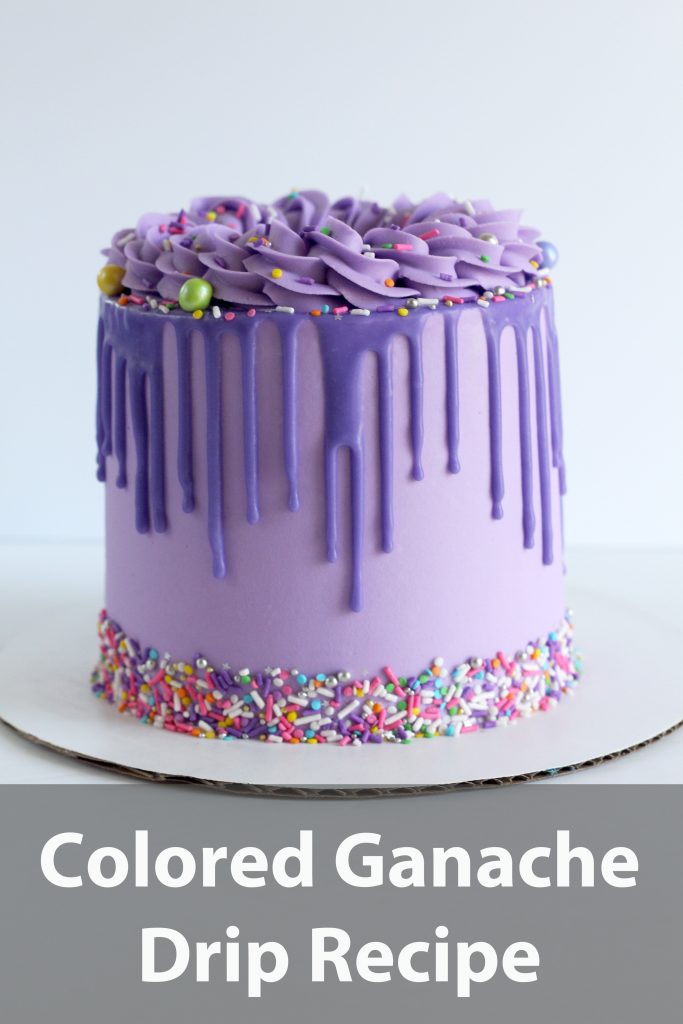
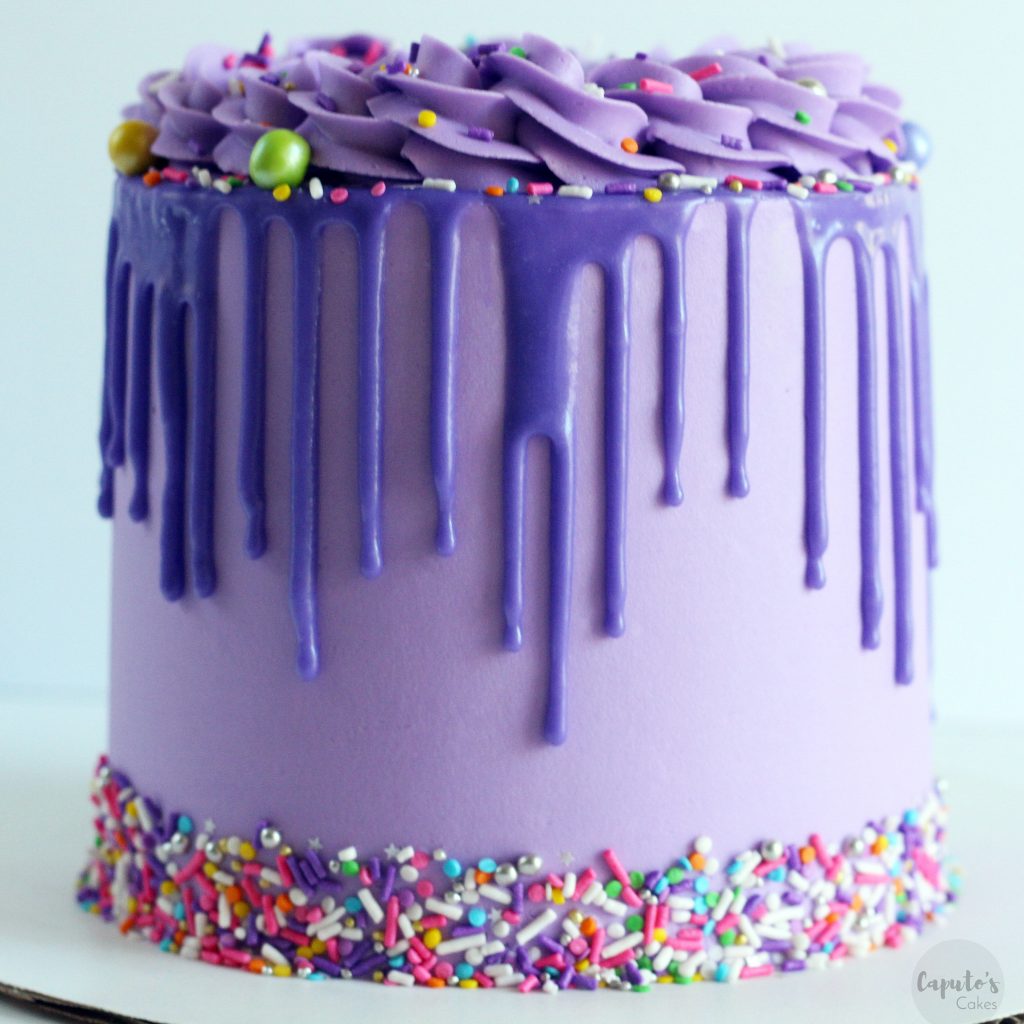
Today I’m sharing my quick and easy recipe for a colored ganache drip. Drip cakes are so fun, and adding a drip to your cake can really help the cake “pop”.
I love to make chocolate ganache, and I often use it as a filling or as a drip on a cake. The only bummer with using chocolate ganache is you can’t add any color to it. So today, Im going to tell you how to make a white chocolate ganache and how you can make a colored ganache drip cake.
Ingredients for a colored ganache drip:
- Heavy Whipping Cream
- White Chocolate Chips
- Gel Food Coloring
I should note that while you can use candy melts for this recipe, I have found that I always have the best results with actual white chocolate chips. But you are welcome to try this recipe using candy melts instead.
When making this recipe, its important to use the exact measurements. If you add too much cream when making your ganache, you will have watery, runaway, and often very thin drips on your cake.
If you add too much chocolate, your drips could be too thick which may result in them not actually “dripping” down the cake sides.
The temperature of your ganache is another big factor in how the drips will turn out. If you don’t allow the ganache to fully cool, the drips can be too warm. When your drips are warm (and because you are using melted chocolate), the drips can easily get away from you. This can result in long drips which will often spill and pile onto the cake board at the bottom.
If your ganache is cold, it becomes very hard to use, and will not produce any drips.
The consistency and temperature of the ganache is key to the perfect drip. I know this might sound very temperamental, but knowing these things will absolutely help you to achieve the best drip for your cake.
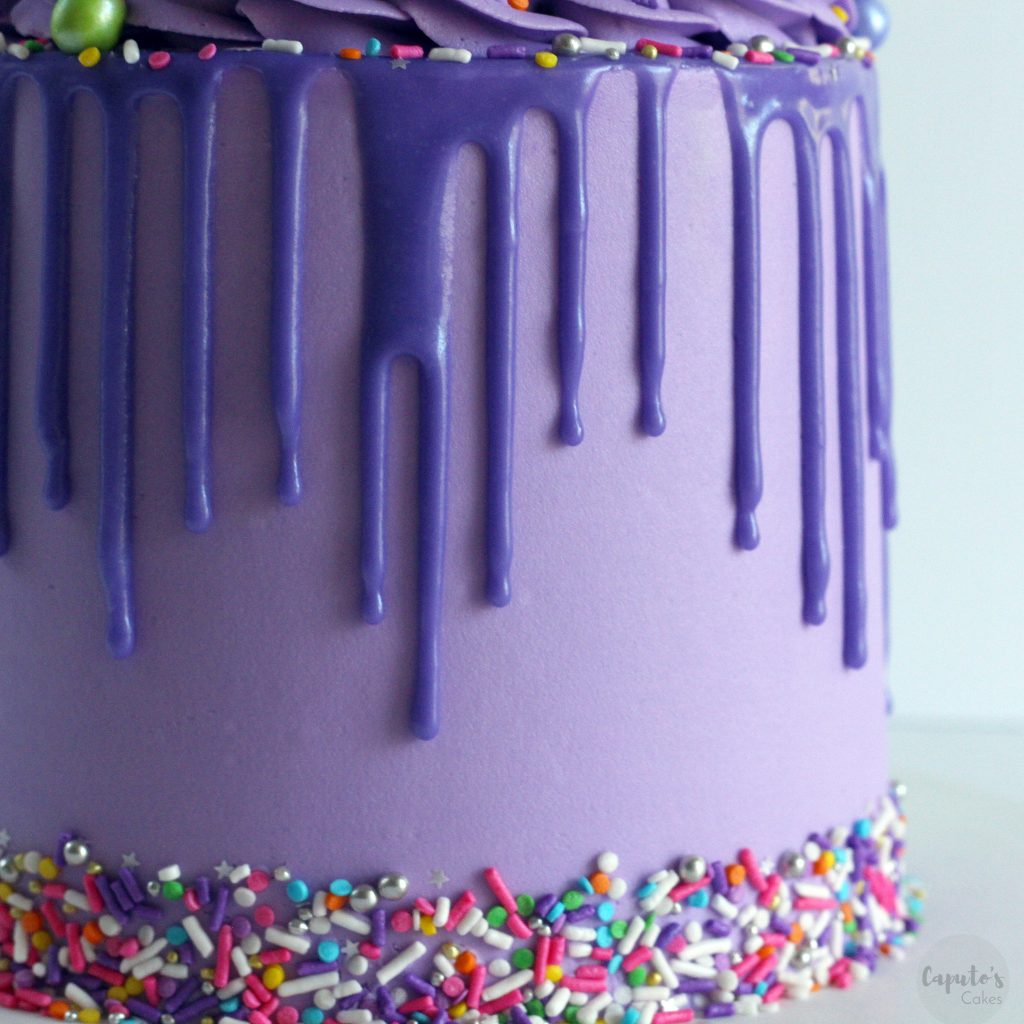
When making colored drips on a cake, you will want to make sure ganache is at room temperature or slightly warm to the touch.
Continue reading below to see the exact steps I use when making my white/ colored drips.
How to make a colored ganache drip:
- 1/3 Cup Heavy Whipping Cream
- 1 Cup White Chocolate Chips, filled completely to the rim of the cup
- Colored food gel
- Buttercream cake
Step 1: In a microwave safe bowl, heat the whipping cream for 1 minute, careful not to burn the cream.
Step 2: Add the white chocolate chips to the bowl, stir and coat them in the cream as much as possible. Allow to sit for a few minutes.
Step 3: Stir the ganache again, the chocolate chips may need to be melted a bit more, which is ok. Microwave the mixture for 30 seconds on defrost or 50% power, just enough to heat up the cream again. Mix the ganache and allow to sit again for a few more minutes.
Step 4: Using a small whisk, stir the ganache until the chocolate pieces are completely melted. If needed, repeat step 3.
Step 5: Once the chocolate chips are completely melted, and the ganache looks smooth, you can now add the gel food coloring. Add in a drop or two to start (you don’t need a lot), and stir until you achieve the perfect color. For my purple drip, I only added 2 very small drops of coloring. Allow the ganache to cool and come to room temperature.
Step 6: Making sure your frosted cake is very cold, add one drip to the very top edge of your cake. I use this single drip as a test, so I like to do this on the “back side”. I wait a moment to see If the drip is the length I prefer, and if it is, I will continue adding more drips to the top edge of my cake. Once your drips are finished, you can complete the top, by adding a layer of ganache to the top of the cake. After adding the drip, pop the cake back in the fridge so the ganache can firm up.
A few notes:
I like to add my drips to the cake with a squeeze bottle, but you can use a spoon if you want too.
I also like to test my drip out on an upside down glass cup. This allows me to see how long the drip goes, and if I need to add anything to it, or cool it or warm it a bit longer.