

Cakesicles are a little bit newer in the baking world. They began popping up a few years ago and started replacing the traditional cake pops. I know so many amazing bakers who seriously rock at making cake pops. However, I also know a lot of bakers who are left feeling very frustrated whenever they make them.
Why is this? Well, cake pops can be really temperamental. Sometimes the chocolate coating cracks, or they fall off their stick. I know for me, I’ve had some cake pops leak oil (still have NO idea why this happened haha). There are so many issues that can come up with cake pops and if bakers can’t rely on them, they can be a hard product to confidently sell.
The solution: Cakesicles. These can be such a great replacement for bakers who do not enjoy making cake pops.
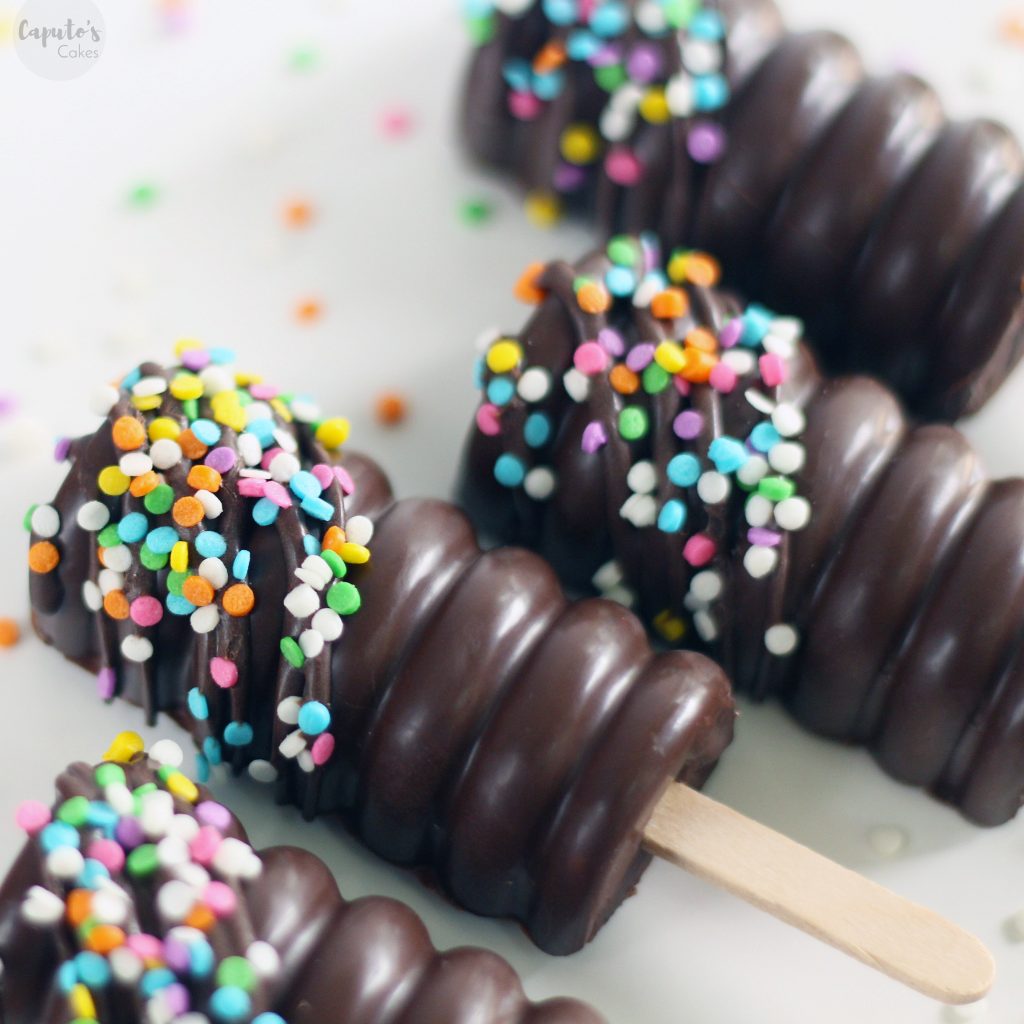
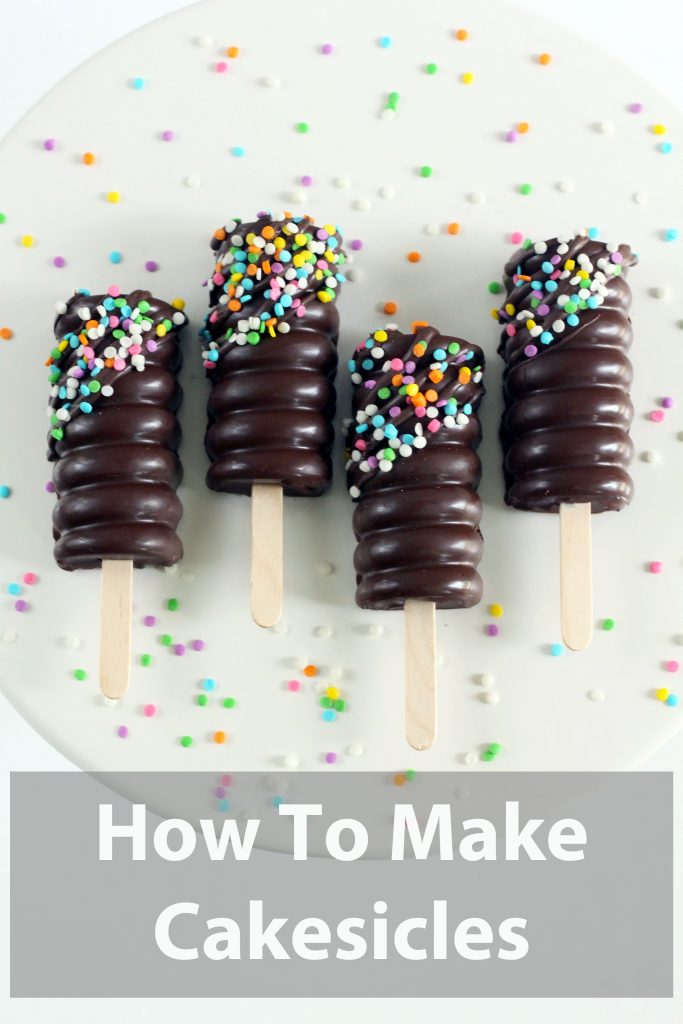
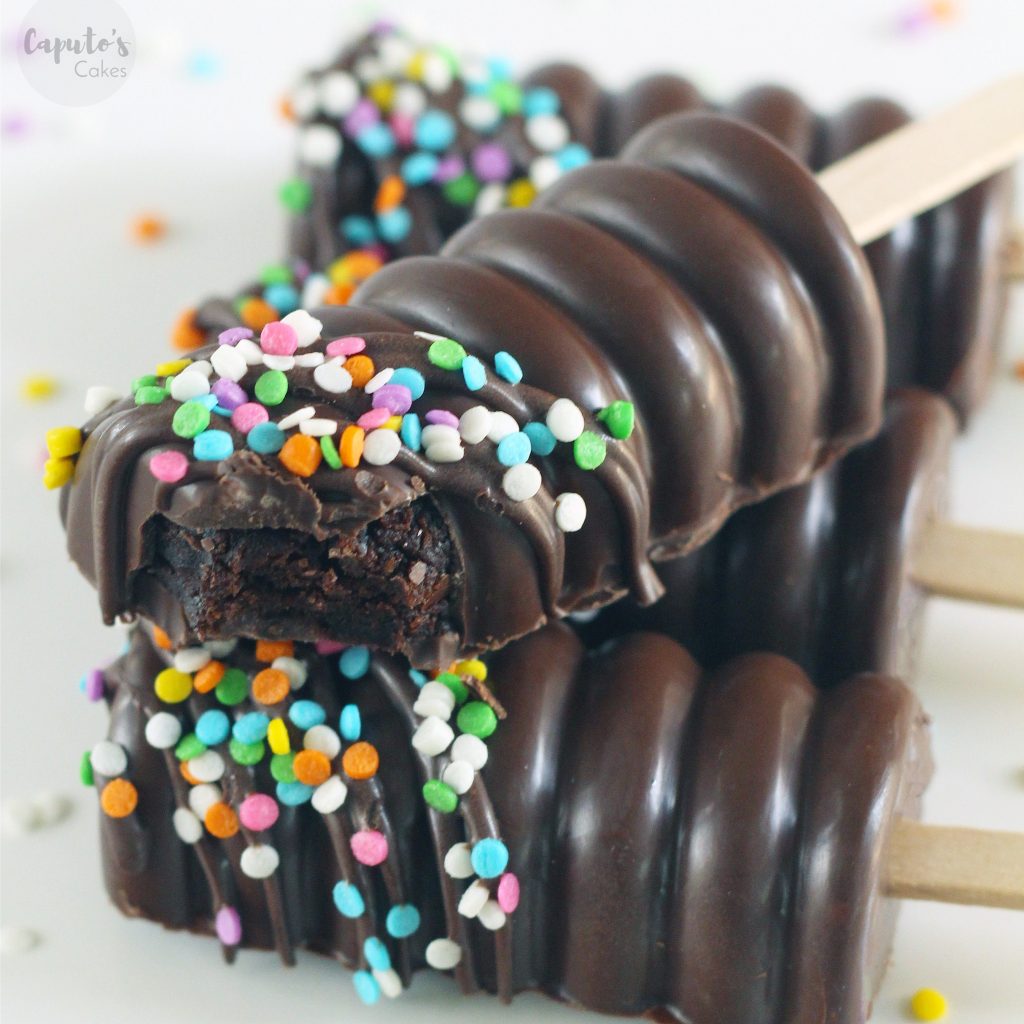
What are cakesicles? Cakesicles are essentially the same thing as a cake pop but bigger. A cakesicle is basically cake on a stick, covered in a chocolate coating. Because most cakesicles are made with a silicone mold, bakers have found that they can be filled with things other than cake. Some fun fillings include cookie dough or brownies. The ones I’m sharing today are actually filled with brownies.
What you need To Make Cakesicles:
- Cakesicle mold (this or this)
- Prepared filling: cake, brownies, cookie dough etc.
- Melted chocolate
- Popsicle sticks
- Spoon
How to make cakesicles using a silicone mold:
Step 1: Bake your filling (cake layer, brownies, cookie dough etc) and set aside to cool.
Step 2: Melt chocolate in the microwave at 50% power or on the defrost setting, be careful not to burn the chocolate. With a spoon or angled spatula, add a thin layer of chocolate coating to the cakesicle mold. Set the mold in the fridge for a few minutes to firm up.
Step 3: Add another layer of melted chocolate over the entire cakesicle mold. This will give you a thicker layer of chocolate coating while also making sure all of the corners of your mold are completely covered. Set the mold in the fridge for 15 minutes
Step 4: While the mold is in the fridge, prepare your cakesicle filling. For these cakesicles I baked brownies, and once they were cooled, I mashed up a few brownie pieces with a spoon. I decided not to add any extra frosting to my filling, because my brownies were moist enough to hold their shape. However, if you use cake, you can add 1 Tablespoon of buttercream to every 2 Cups of cake crumbs.
Step 5: Add a small amount of your filling to each cakesicle mold cavity. Don’t overfill the cakesicle mold. Using an angled spatula, you can wipe off any excess filling, making sure the layer is even with the top of the silicone mold. Push the popsicle stick in to the filling about ½ way. Set the cakesicle mold in the fridge for 20 minutes.
Step 6: Take your melted chocolate and add one last layer to the cakesicle mold top. Smooth out the chocolate as much as possible, using the back of your spoon or an angled spatula (sometimes I even use a cake brush)… its okay if its not perfect, this will become the back side of the cakesicle. Make sure that your melted chocolate top completely touches the edge of your cakesicle mold, this will completley coat the cakesicle filling with a chocolate shell.
Place your cakesicles back into the fridge for about 20 minutes. Once chilled, you can carefully pop each cakesicle out of the mold. If you want, you can decorate the front at this time. I like to pipe some extra melted chocolate on the top of my cakesicles, and then add some sprinkles for a pop of color.
Can you make cakesicles by dipping them instead of coating the silicone mold with chocolate?
YES! I don’t use this method, but I know others who prefer the dipping method for making cakesicles. If you want to dip your cakesicles this is how you can do it:
Step 1: Fill the silicone mold with your cake filling and insert the popsicle stick. Allow to chill in the fridge for 15 minutes
Step 2: Pop each cakesicle out of the silicone mold, and set aside on parchment paper. Heat up melting chocolate in the microwave in a tall glass.
Step 3: Dip each cakesicle in the melted chocolate, being sure to scrape off any excess chocolate from the back of the cakesicle. Set on parchment paper and allow the chocolate to firm up. Repeat with each cakesicle.
I definitely recommend trying out each method to see what works best for you!
You can watch the time-lapse video for these cakesicles here: